The Yahoo group for the HobbyCNC boards contains a file which describes a linear, unregulated 10A power supply, suitable for driving four motors. This power supply converts 120VAC to 34VDC up to 10A. The circuit diagram is very simple, but a lot of additional effort and parts are required to construct a working power supply.
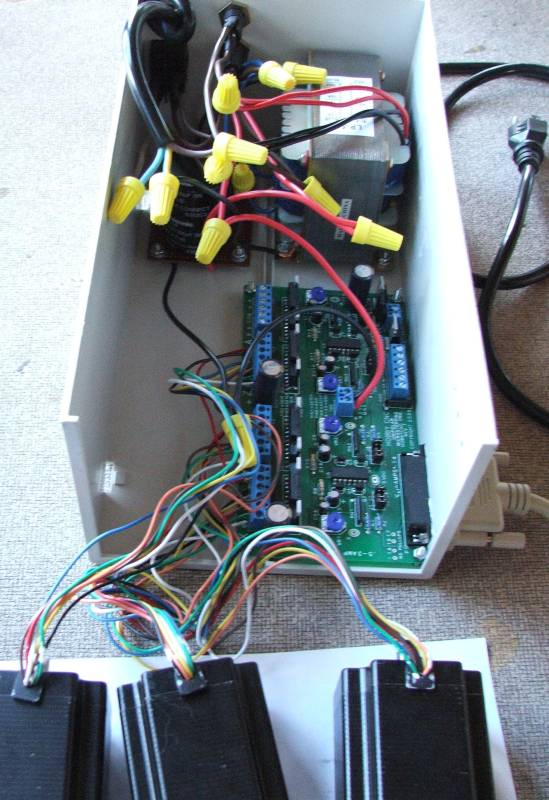
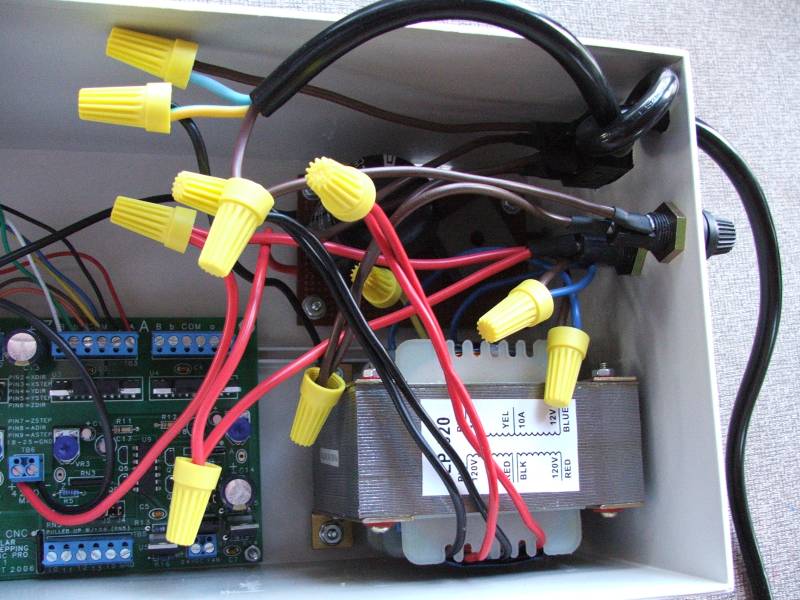
Here is a picture of my completed power supply connected to three motors:
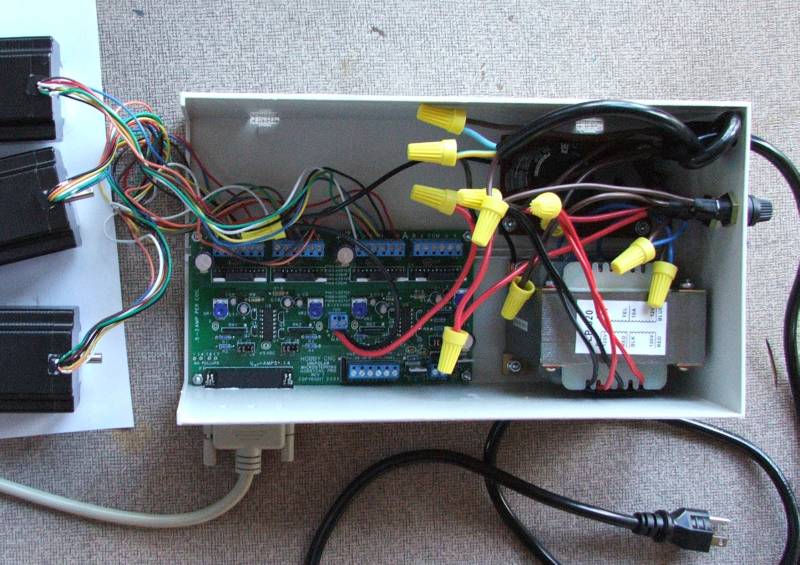
As you can see, the power supply sits in a box with the HobbyCNC board. Currently the lid is missing, as are the ventilation holes. Also the motors are simply connected to the board rather than via eight conductor cable that goes through holes in the side of the case.
I am not going to reproduce a circuit diagram here because I don’t want the liability issues of publishing a circuit diagram that involves lethal voltages. If you own a HobbyCNC board then you can get the circuit diagram (and warnings) from the files section of the Yahoo group, otherwise you can find plenty of designs using Google. In general however the power supply should match the requirements of the control board you are using, and the vendor of the control board should be able to suggest a ready-made power supply or a circuit diagram for one.
All information in this posting is for reference only. Anyone who uses this information assumes all risks. The voltages involved can kill and all necessary precautions should be taken. In addition a large capacitor is used which can keep the voltages high for a period after the power is turned off. The power supply should not be run with the lid off and all exposed metal parts inside and outside of the power supply should be grounded. For this reason I chose to use a grounded power cable rather than the cheaper two prong design. If you are not proficient with using mains voltages you are better off just buying a suitable power supply. I do not claim or guarantee that any parts I have used are suitable for this purpose. All information is provided “as is” and without waranty. Y0u have been warned…
The power comes in to the board via a standard power cord and is connected through a 4A fuse to a rocker switch. After the rocker switch is the 10A transformer than produces 24VAC. This is then fed into a AC to DC converter board to produce 34VDC. The DC voltage then goes through a 10A fuse to the HobbyCNC board.
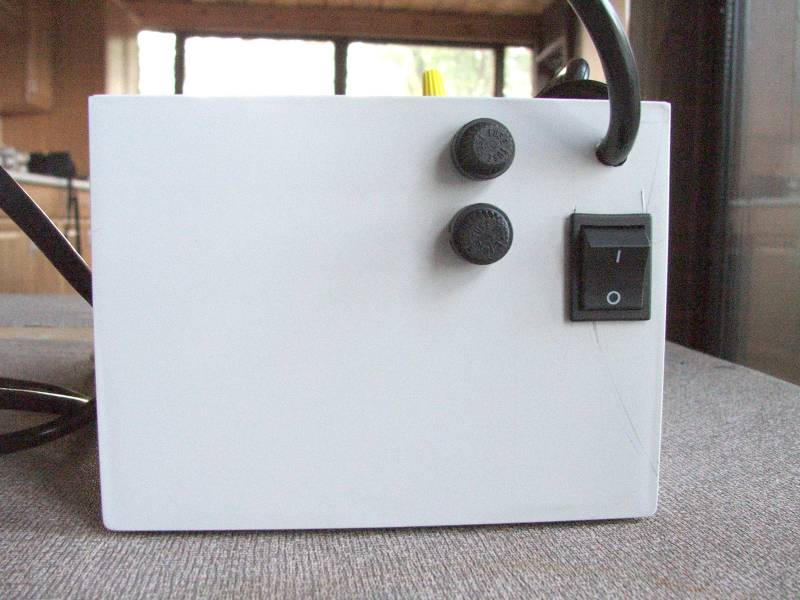
Here is a view of the rocker switch and the two panel mounted fuse holders:
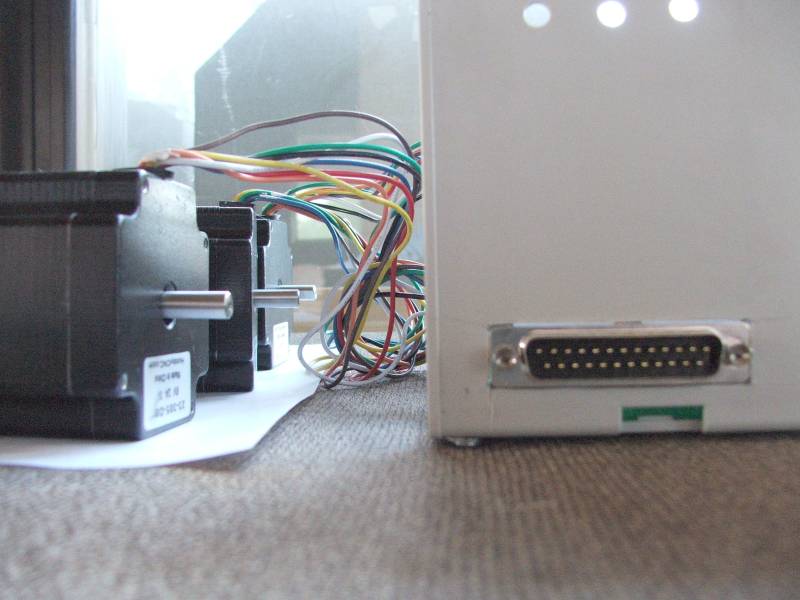
The transformer, AC to DC board and the HobbyCNC board are all bolted down to the bottom of the case using bolts. I added 1/4″ spacers below each to lift the boards up off the bottom of the case. I positioned the HobbyCNC board up against the edge of the case and cut a rectangular hole for the PC connector. This fits snugly giving a nice finish:
The AC to DC board is made of stripboard (prototype board with copper strips), and contains the recitifer, capacitor and resistor. I wanted to make the construction modular so I used wire connectors to connect the various components (transformer, AC to DC board, fuses, switch, HobbyCNC board, power cord) together. This allows me to easily replace any component when needed.
Still to do is the lid, an emergency stop switch and some ventilation holes.
Bill of Materials (read the disclaimer at the start of this post!):
1x 24V 10A Transformer LP-520, MPJA.com #7846TR, $17.99
1x 27000uF Electrolytic Capacitor, Digi-key #P10021-ND, $11.72
1x 2kOhm, 1W 5% Metal Oxide Resistor, Digi-key #2.0KW-1-ND, $0.15
1x 35A, 600V Bridge Rectifier Wire Leads, Digi-key #MB356W-BPMS-ND, $5.00
1x DPST 16A Rocker Switch, Digi-key #CH784-ND, $1.46
1x 16AWG 3 Conductor Power Cord 79″, Digi-key #Q110-ND, $5.43
2x 3AG Panel Mount Fuseholder, Digi-key #F005-ND, $6.10
1x 4A 250V Fuse, Digi-key #283-2023-ND, $0.48
1x 10A 250V Fuse, Digi-key #283-2622-ND, $0.57
1x 14AWG Wire Red 2ft, Local, $0.46
1x 14AWG Wire Black 2ft, Local, $0.46
1x 14AWG Wire Brown 2ft, Local, $0.46
1x Heat Shrink Tubing Assorted Sizes, Local, $2.99
4x #4 x 3/4″ Bolt, Local (Ace Hardware), $0.28
4x #4 Nut, Local (Ace Hardware), $0.24
4x #4 Washer, Ace Hardware), $0.24
4x #4 1/4″ Spacer, Local (Ace Hardware), $2.32
8x #6 x 3/4″ Bolt, Local (Ace Hardware), $0.56
8x #6 Nut, Local (Ace Hardware), $0.48
8x #6 1/4″ Spacer, Local (Ace Hardware), $2.32
15x #6 Washer, Local (Ace Hardware), $0.90
1x #6 External Tooth Washer, Local (Ace Hardware), $0.08
1x Stripboard, Local, $3.49
1x 20 Pack Wire Connectors 600V, Local (Home Depot), $1.99
Total cost: $66.17
Not included: soldering iron, solder, shipping costs, taxes on local purchases.
Note that the shipping cost for the transformer was $10.51.
The total cost including taxes and shipping was probably closer to $85. A ready-made power supply can probably be purchased for $110 plus shipping, so perhaps it didn’t save very much.
Missing from the list is the case. That is because I managed to salvage an old index card drawer and holder. I threw the drawer away and carved up the holder to make the case. This cost me $2 from World Care. A brand new plastic case will cost around $30 from Digi-key or Mouser.
The cost of the power supply is not insignificant. When people post low cost CNC designs they love to indicate how cheap the project is but omit important details like the power supply. If you want motors with a good amount of torque then a good sized power supply is also required.
Comments are closed