Interesting Tech Projects
Configuring EMC2 For Three Axis Stepper Motor Control
There are many ways to configure EMC2, suiting many different uses. But perhaps the most common is control of three stepper motors. This post describes the process I went through to configure EMC2 for my CNC machine, which is a Fireball CNC V90. These steps may not match exactly your needs, but perhaps it will help as a starting point for further exploration.
It assumed that you have managed to get EMC2 installed and have run the latency tests with no overruns. If you are seeing overruns then try the hints on the EMC2 Troubleshooting page.
When you see ‘$’ in this post, it represents the user prompt. Don’t type it, only type the commands that follow. Replace “andy” with your own user name.
First we need to know how many steps per second your PC can generate. To do that we run the kernel latency test:
$ cd /usr/realtime*/testsuite/kern/latency

$ sudo ./run
The test will output a set of numbers. Use the PC to browse the web, play music and check email for a few minutes. However don’t run EMC2. Stop the test and note the largest value in the “ovl max” column. In my case it was 92,191. Values over 100,000 may not give good performance. In general the larger the value the worst CNC performance will be. There are some hints in the EMC2 wiki on how to lower this value.
92,191 means 92.191us (us = microseconds). Between the PC at the stepper motor is a driver chip, such as the SLA7078MR. This chip has some delays that are required for each edge. By reading the datasheet for the driver chip we can find out what this is, and for the SLA7078MR it is 12us. If you don’t know or not sure, I would suggest you pick a value similar to this and err on the side of caution by making the value a bit larger.
So we have 93us (rounded up) + 12us = 105us = 105,000ns (ns = nanoseconds). This is the BASE_PERIOD (more on that in a bit).
Therefore the maximum step rate for my PC is 1 / (105us x 2) = 4,762 steps per second.
It’s possible to tweak the steplen, stepspace, dirsetup and dirhold values to achieve better results than this, but that topic is outside the scope of this post. See the EMC2 documentation for details.
We next need to calculate how many steps are needed to move one inch with 1/4 microstepping. If you wish to use a different microstepping configuration or millimeters then adjust the following calculations accordingly.
My stepper motors require 200 pulses per revolution. This is a very common amount. With 1/4 microstepping it will take 200 x 4 = 800 steps per revolution.
On the X and Y axis of my machine the lead screw has 10 turns per inch but it is has two starts, which makes it 5 turns per inch. This is a pitch of 1 / 5 = 0.2 inches.
Therefore 0.20in / 800 steps per rev = 0.00025in per step.
Therefore 1 / 0.00025in = 4000 steps per inch. 4000 becomes the INPUT_SCALE value for X and Y.
The maximum speed is 4762 steps per second / 4000 = 1.1905in per second = 71.43in per minute. 1.1905 is the MAX_VELOCITY for X and Y.
On the Z axis of my machine the lead screw has 12 turns per inch. This is a pitch of 0.0833in.
Therefore 0.0833in / 800 steps per rev = 0.000104166in per step.
Therefore 1 / 0.000104166in = 9600 steps per inch. 9600 becomes the INPUT_SCALE value for Z.
The maximum speed is 4762 steps per second / 9600 = 0.4960416667in per second = 29.7625in per minute. 0.4960416667 is the MAX_VELOCITY for Z.
We now have all the information needed to complete the configuration of EMC2. First we must copy the example configuration files and then customize them.
$ mkdir /home/andy/emc2/

$ cp /etc/emc2/sample-configs/stepper /home/andy/emc2/

$ sudo chown andy:andy /home/andy/emc2/*
Rename all values to remove “dpkg-new” from the end of the file names. Then:
$ cd /home/andy/emc2

$ mv stepper_inch.ini mymachine_inch.ini

$ nano -w mymachine_inch.ini
Scroll down to the BASE_PERIOD line and set it to the value calculated in nanoseconds. In my case it is 105000.
Scroll down to the trajectory planner and set the MAX_VELOCITY value to the largest MAX_VELOCITY value of all the axis. In my example it is 1.1905.
Scroll down to the section that configures the first axis (X) and set the INPUT_SCALE to the value calculated. In my example it is 4000. Set the MAX_VELOCITY and STEPGEN_MAXVEL to the MAX_VELOCITY value for the axis. In this example it is 1.1905.
Repeat for the Y and then Z axis.
The final step is to edit standard_pinout.hal to match the pinout of your controller board. The important section in the file looks something like:
linksp Xstep => parport.0.pin-03-out

linksp Xdir  => parport.0.pin-02-out

linksp Ystep => parport.0.pin-05-out

linksp Ydir  => parport.0.pin-04-out

linksp Zstep => parport.0.pin-07-out

linksp Zdir  => parport.0.pin-06-out
Simply change the “03”, “02”, etc. values to match the pin numbers used by your board. “Xstep” means the step input for the X axis.
Now run EMC2 using:
$ emc /home/andy/emc2/mymachine_inch.ini
Set the jog rate to the maximum for each axis in turn and jog the axis. It is possible that the axis may stall or lose steps. This is because the value we calculated is a theoretical maximum. However it gives you a starting point to reduce the speed of the axis until it works reliably. To do this lower the jog speed slightly until it works then using the INPUT_SCALE work out a new value for the number of steps per axis. For example, assuming we had to lower the jog speed to 60.000 in per minute on the X axis:
60.000 in per minute / 60 = 1.000 in per second. 1.000 in per second x 4000 steps per inch (INPUT_SCALE) = 4000 steps per second
Now a new value for BASE_PERIOD can be calculated:
1 / 4000 steps per inch / 2 = 125,000ns
Edit mymachine_inch.ini and set the new BASE_PERIOD value. Note that this will lower the speed of all axis. Recalculate the MAX_VELOCITY value for all axis and update the configuration file with the new values. Then retest.
I found that on my PC it can operate at the theoretical maximum speed without problems. I hope this helps you configure EMC2 for your machine.
| Print article | This entry was posted by Andy on April 29, 2008 at 11:25 pm, and is filed under CNC, Linux. Follow any responses to this post through RSS 2.0. Both comments and pings are currently closed. |
Fireball V90 EMC2 Configuration Files
about 16 years ago - 4 comments
I am making my configuration files available to help anyone trying to get their Fireball V90 machine working with EMC2. The configuration is for inches, 1/4 microstepping and the HobbyCNC Pro board. To use these files you will first need to perform the latency test and work out the base period for your PC. Open…
First Steps With EMC2 and AXIS
about 17 years ago - Comments Off on First Steps With EMC2 and AXIS
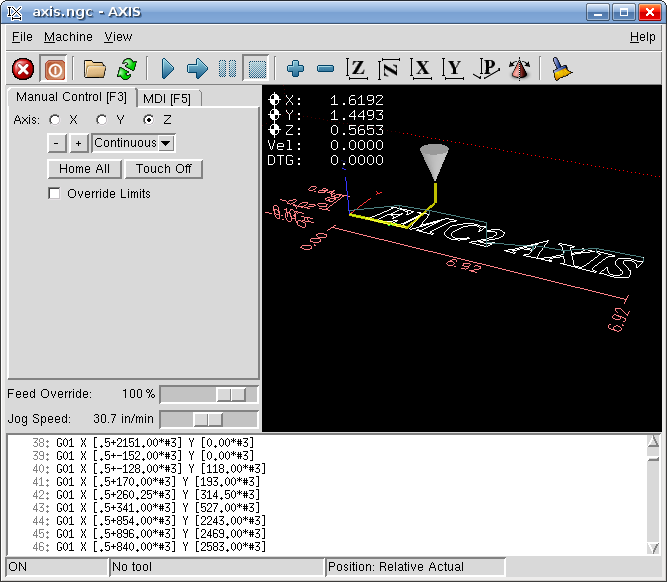
This post describes the first steps after running EMC2 with the AXIS interface for the first time. To start choose AXIS -> Sim from the menu after starting EMC2. Starting the attached CNC machine (in this case a simulation) requires two steps. First the emergency stop (e-stop) must be turned off. Then power must be…
Comments are closed.
about 12 years ago
Hi, I also bought a V90, however, I am not familiar with EMC, nor Ubuntu, so I am an end user… I configured EMC with the stepconf wizard, but the motors dont move at all, they get hot and one can not turn the shafts by hand, so I guess it is good news… So I wonder if you could help me with these issues, could be the EMC configuration, could be the parallel port… But as I mentioned earlier, I am not familiar with Ubuntu so the common advise I get from Linux CNC, I cant simply execute… Thanks