Interesting Tech Projects
Banjo

Drum and Banjo Head Tension Gauge
Aug 25th
Measuring the tension on the head of a drum or banjo is important in order to be able to determine if the head is the right tension for your needs. It’s also useful to measure tension that gives a particular tone you like, ensuring you can always get back to the same tension after swapping the head or experimenting.
A commercial gauge is available called a Drum Dial and retails for $60 or more. Here is how I made mine for just a few dollars.
I started off with a cheap Harbor Freight dial indicator. Mine is digital but the analog version would work fine also. These can be picked up for $15 or less with coupons.
Next I added a base. I 3D printed mine but it can also be made out of wood. The spring in the dial indicator is quite weak so I designed the base so that the zero point is one millimeter from maximum spring compression. This ensures that we are using as much spring pressure as the dial indicator can give to press into the head. The base is a friction fit onto the indicator and a tight fit is needed. The bottom of the base has to be completely flat.
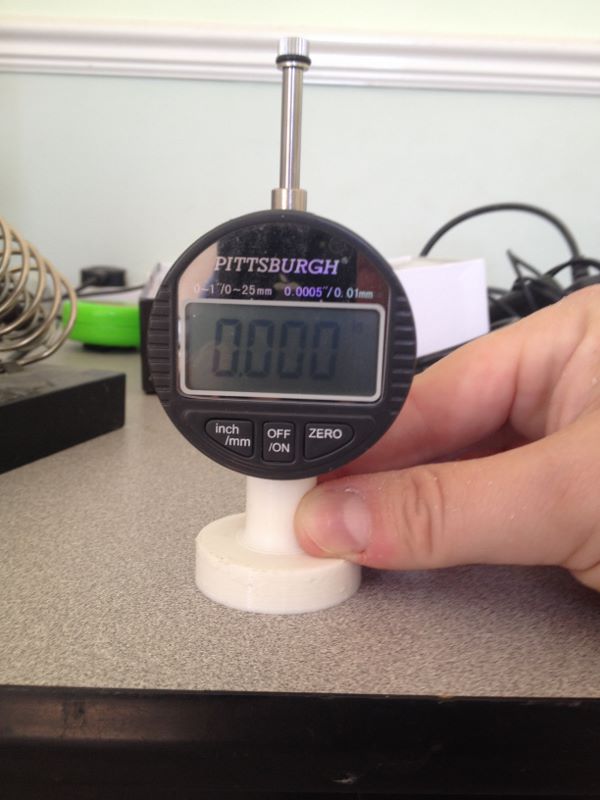
Once the base is installed turn on, press down on a flat surface and set to zero. Remove from the surface and apply a few times to make sure the zero point is always found.
Now press down on the drum or banjo head to measure the head tension. The Drum Dial comes with a spacer to help keep measurements away from the tension hoop. I decided to eyeball it instead.
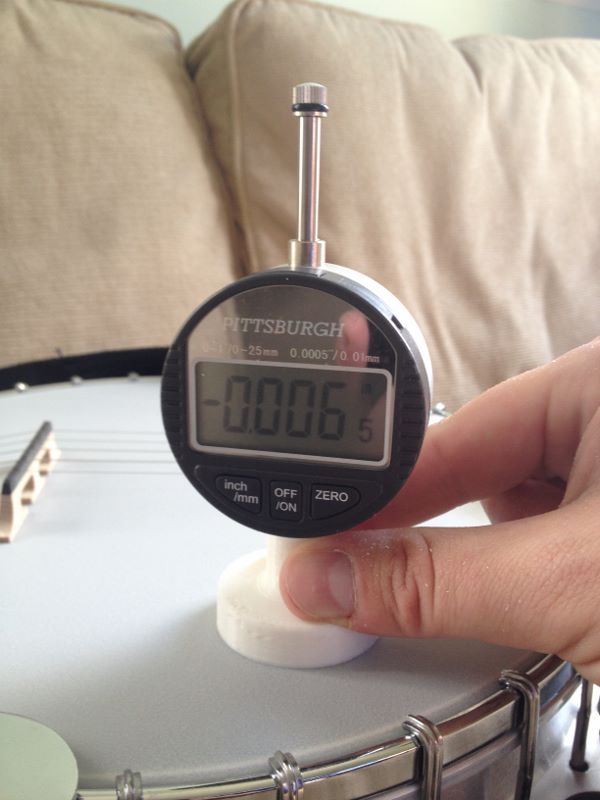
The values obtained can’t be compared with a Drum Dial or other DIY tension gauges because the result is dependent on the strength of the spring however Drum Dials use a scale that sets 100 to the highest tension. To convert the dial indicator value to the same scale:
- 0.000″ = 100
- -0.001″= 99
- -0.002″ = 98
- …
- -0.010″ = 90
The 3D printed base used three shells, 20% infill, took about one hour and cost about $0.40 in plastic.
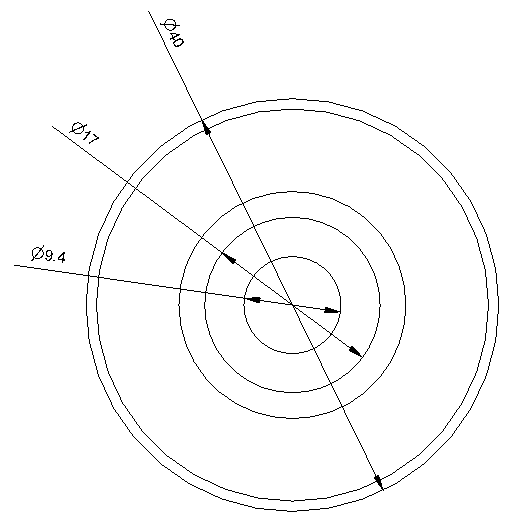
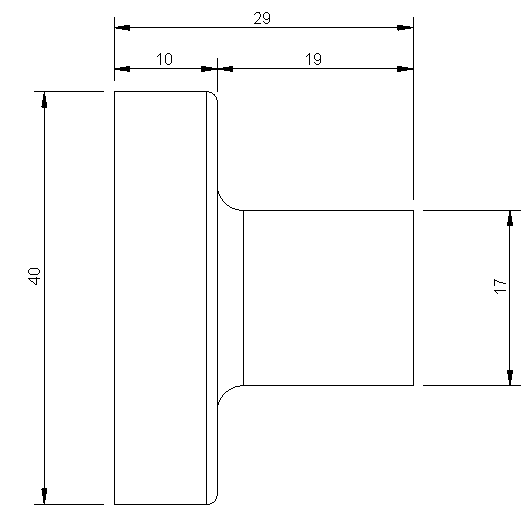
Here are the dimensions of the base for making your own. All dimensions are in millimeters.