Interesting Tech Projects
How To Install EMC2 on Unbuntu 7.10 Gutsy From Scratch
April 2008 – Update – I’ve modified the instructions so that EMC2 can now be run as a user.
April 2008 – Update – Fixed some mistakes.
The following instructions will describe how to install the latest version of EMC2/LinuxCNC in Ubuntu 7.10 Gutsy Gibbon.
Why would you want to do this? You would do this if you don’t want to wait for new .deb files from the EMC2 team or you want to install EMC2 in the latest version of Ubuntu to take advantage of all the new features. The alternative is to use the Ubuntu 6.06 LTS live CD, install and then either stick with the software versions supplied or upgrade to the latest versions (such as device drivers, Gnome, Xorg, etc.), which is a big task itself.
Why would you not want to do this? I don’t recommend following these steps if you are unfamiliar with Linux and the shell/command prompt. It will either be a great learning experience or a very frustrating waste of time.
I am sure these steps can be simplified and improved, however they were created from many hours of experimenting and following dead-ends. I wanted to try and give you exactly what I ended up using, rather than an optimization. For example I’m sure that not all the reboots are needed, but they only take 60 seconds on my PC anyway.
These steps should work on a stock installation of Ubuntu 7.10, however I don’t make any claims that they will work for anyone else. If the software didn’t install correctly and the motors go crazy and move something that destroys your house, don’t blame me – these instructions are provided “as is” and without any warranty. Use at your own risk. If you spot a mistake please let me know and I will update the instructions.
Where you see “andy” replace with your own username, unless it is also “andy”. 🙂
‘$’ represents the prompt, to show you where the start of lines are. Don’t enter this, just what follows.
The process looks like this:
Get a vanilla kernel and patch it with RTAI support.
Test kernel.
Build and test RTAI modules.
Build EMC2.
Enable universe repository in /etc/apt/sources.list. Open a terminal window and then:
$ sudo apt-get update

$ sudo apt-get install build-essential libncurses5-dev kernel-package

$ cd /usr/src

$ sudo wget -c http://www.kernel.org/pub/linux/kernel/v2.6/linux-2.6.22.tar.gz

$ sudo tar xzvf linux-2.6.22.tar.gz

$ sudo mv linux-2.6.22 linux-vanilla-2.6.22

$ sudo ln -s linux-vanilla-2.6.22 linux

$ cd linux

$ sudo cp /boot/config-2.6.22-14-generic .config

$ sudo make menuconfig
At this point a menu will appear. Make the following choices:
Loadable module support > Module versioning support (N)
Loadable module support > Set version information on all module symbols (N)*
Processor type and features > Preemption model > Preemptible kernel (low latency desktop)
Processor type and features > Symmetric multi-processor support (N)**
Processor type and features > Local APIC support on uniprocessors (N)
Power management options (ACPI, APM) > ACPI support (N)
Power management options (ACPI, APM) > APM BIOS support (N)
Power management options (ACPI, APM) > CPU frequency scaling (N)
Kernel hacking > Compile the kernel with frame pointers (N)
* only if you have it in the menu
** only if your PC is not dual or quad core
Download rtai-3.6-test1.tar.bz2 from www.rtai.org (click on “RTAI Repository” link) to the desktop.
$ cd /home/andy/Desktop

$ bunzip2 rtai-3.6-test1.tar.bz2

$ tar xvf rtai-3.6-test1.tar
$ cd /usr/src/linux

$ sudo patch -p1 < /home/andy/Desktop/rtai-3.6-test1/base/arch/i386/patches/hal-linux-2.6.22-i386-1.10-09.patch
$ sudo make-kpkg --initrd --revision=1 --append-to-version=-realtime kernel_image kernel_headers
Some questions may appear which need to be answered (answer Y to any others that appear):
Interrupt pipeline – Y
Interrupt pipeline maintain backwards compatibility – Y
Interrupt pipeline debug – N
Now go and do something else for a while. On my P4 1.6GHz PC the kernel took 2 hours and 50 minutes to build.
$ cd ..

$ sudo dpkg -i linux-image-2.6.22-realtime_1_i386.deb

$ sudo nano -w /boot/grub/menu.lst
Find the line that looks like:
hiddenmenu
and change it to:
#hiddenmenu
If your PC already dual-boots (for example Ubuntu and Windows) then the hiddemenu is probably already commented out (using the ‘#’).
Save and exit nano.
Reboot and choose the realtime kernel from Grub menu.
Enter:
$ uname -a
and you should get something like:
Linux pepper 2.6.22-realtime #1 PREEMPT Sun Oct 28 10:54:43 MST 2007 i686 GNU/Linux
Make sure everything works ok (browsing, editing files, etc.)
Now we need to build the RTAI modules. This has to be done while running the realtime kernel we just built and booted into.
$ cd /home/andy/Desktop/rtai-3.6-test1

$ make menuconfig
Again a menu appears. Make the following selections:
Machine (x86) > Number of CPUs (enter the number you have here)
Exit and save configuration
$ make

$ sudo make install
Reboot back into the realtime kernel.
$ cd /usr/realtime/bin

$ sudo nano -w rtai-load
Change the first line from:
#!/bin/sh
to:
#!/bin/bash
and save. Then:
$ sudo nano -w /etc/init.d/create-rtai-devices.sh
Enter:
#!/bin/bash

mknod -m 666 /dev/rtai_shm c 10 254

for n in `seq 0 9`

do

f=/dev/rtf$n

mknod -m 666 $f c 150 $n

done
Save. Then:
$ sudo chmod 755 /etc/init.d/create-rtai-devices.sh

$ sudo update-rc.d create-rtai-devices.sh defaults
Reboot back into the realtime kernel.
Then test the RTAI support with:
$ cd /usr/realtime/testsuite/user/latency

$ sudo ./run

$ cd /usr/realtime/testsuite/user/preempt

$ sudo ./run

$ cd /usr/realtime/testsuite/user/switches

$ sudo ./run

$ cd /usr/realtime/testsuite/kern/latency

$ sudo ./run

$ cd /usr/realtime/testsuite/kern/preempt

$ sudo ./run

$ cd /usr/realtime/testsuite/kern/switches

$ sudo ./run
These tests spit out lots of numbers. The thing we are looking for here are kernel panics, system crashes, etc. Also make sure there are no overruns in the tests that display an overruns column.
If you get something like:
insmod: error inserting '/usr/realtime/modules/rtai_hal.ko': -1

Operation not permitted
then try:
$ sudo nano -w /boot/grub/menu.lst
and find the kernel line for the realtime kernel. Add “lapic” to the end of it and reboot, then run the tests again. For example:
kernel /boot/vmlinuz-2.6.22-realtime root=UUID=45d21232-cf0d-cc3d-87ce-8453214d7a6f ro quiet splash vga=794 lapic
Once you have the real time tests working continue with:
$ sudo nano -w /etc/modprobe.d/emc2
Enter:
install parport_pc /bin/true
Save then reboot back into the realtime kernel. Now to build and install EMC2.
$ sudo apt-get install python python-imaging python-imaging-tk python-numarray python-dev

$ sudo apt-get install tcl8.4-dev tk8.4-dev yapps2

$ sudo apt-get install libgtk2.0-dev libpth-dev libreadline5-dev libxmu-dev libxaw7-dev libglu1-mesa libglu1-mesa-dev libgl1-mesa-dev

$ sudo apt-get install pciutils-dev bwidget cvs latex2html preview-latex-style libaiksaurus-1.2-0c2a libgnomeprintui2.2-dev

$ sudo apt-get install imagemagick lyx
$ cd /usr/src

$ sudo dpkg -i linux-headers-2.6.22-realtime_1_i386.deb

$ cd ~

$ cvs -z5 -d:ext:anon@cvs.linuxcnc.org:/cvs co emc2

$ cd emc2/src

$ ./configure --with-realtime=/usr/realtime --with-kernel-headers=/usr/src/linux-headers-2.6.22-realtime

$ make

$ sudo make install
$ sudo nano -w /etc/security/limits.conf
Add the line:
* hard memlock 20480
Save and reboot into the realtime kernel.
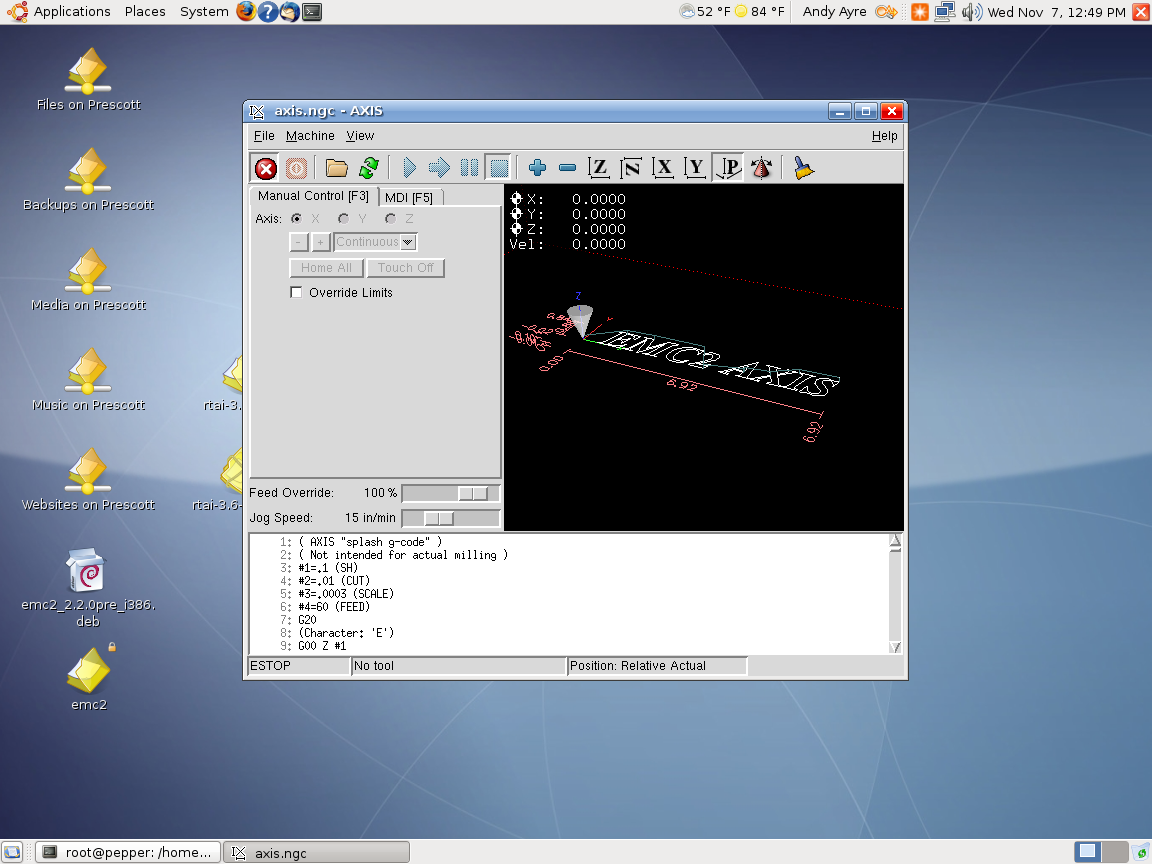
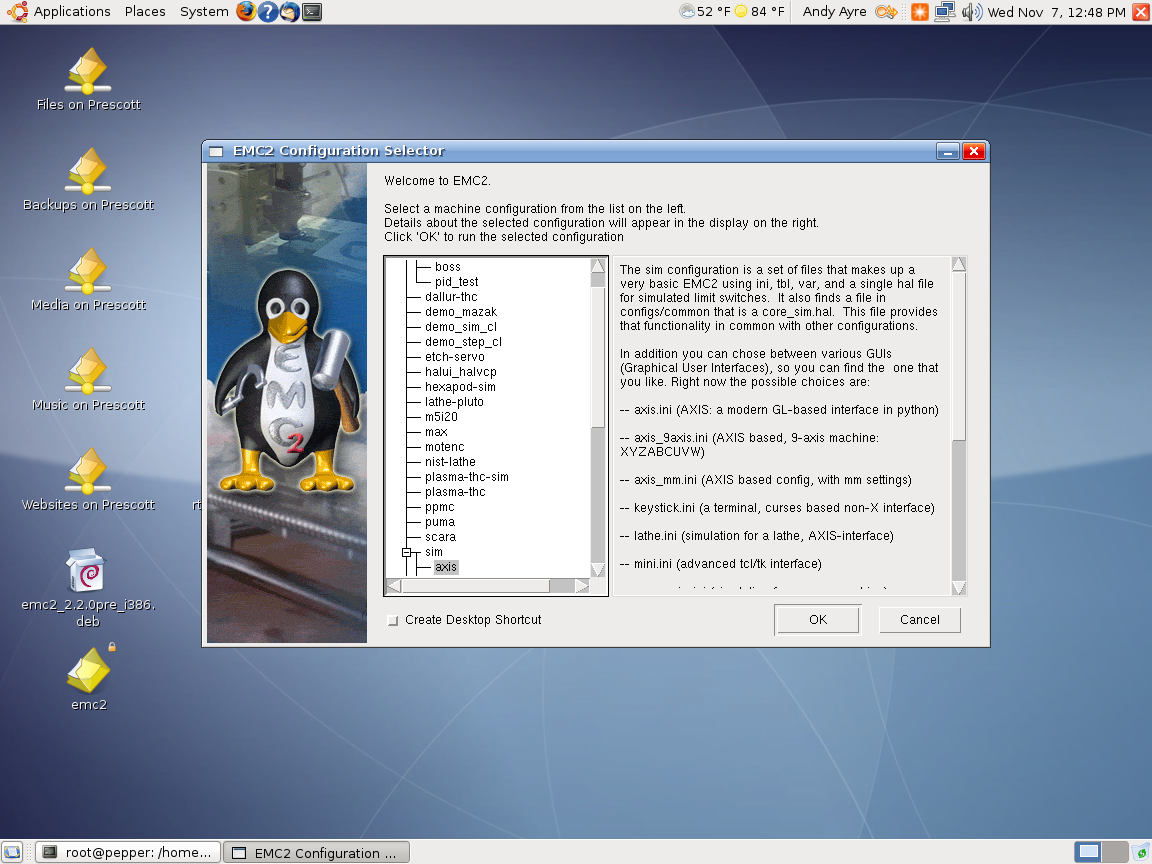
To run EMC:
$ /usr/local/bin/emc
A window should appear with a choice of configurations. Choose Axis -> Sim and the Axis window should open. Congratulations EMC2 is now running!
Note that when running the realtime kernel the computer may not power itself off when the shutdown option is chosen. This is because the power management options have been disabled in the kernel. On my PC I wait a couple of minutes after the screen goes blank then press the power button on the front of the PC. This turns it off.
| Print article | This entry was posted by Andy on November 7, 2007 at 4:02 pm, and is filed under CNC, Linux. Follow any responses to this post through RSS 2.0. Both comments and pings are currently closed. |

Using Alibre Design for Multi-color and Multi-material 3D Printing Part II
about 11 years ago - 1 comment
Previously I wrote about my little utility that allows exporting properly positioned STLs from Alibre Design so they can be imported into a slicing program for multi-color printing. This is fine for use with the RepRapPro slicer but perhaps not with other slicers. Slic3r is a very popular, fast and flexible slicing program and now…

Ray Tracing (Rendering) with Alibre Design PE
about 11 years ago - Comments Off on Ray Tracing (Rendering) with Alibre Design PE
The Professional and Expert versions of Alibre Design come with a ray tracer called Keyshot but the Personal Edition of Alibre Design does not. However it is easily possible to use the free and very powerful Blender to generate ray traces of your 3D models. First you must design the parts in Alibre Design and…

Using Alibre Design for Multi-color and Multi-material 3D Printing
about 11 years ago - 2 comments
When you wish to print out a part on a 3D printer the workflow is simple – design the part, export to STL and print it. This is fine when you are only printing with a single material or color. Becoming increasingly popular and affordable are 3D printers that support printing with two or three…
Radio Controlled Aircraft for Stroke Victims
about 12 years ago - Comments Off on Radio Controlled Aircraft for Stroke Victims
This post introduces my open source radio control project. It allows an RC aircraft to be controlled from a Wii Nunchuk, i.e. with one hand! Videos will be posted when they are available but so far it is working great in the flight simulator and with a stationary aircraft. All documentation, source files and binary…
The Progress of Linux
about 13 years ago - 2 comments
Back in 1998 I tried installing RedHat 6 on a spare PC. When the desktop loaded it was, ummm, wobbly. I then spent the best part of the next two weeks fighing with X configuration files setting obscure items such as front and back porches in a futile attempt to stabilize the display so it…
Installing Ubuntu Netbook Remix on an Acer Aspire One
about 15 years ago - 4 comments
The Acer Aspire One is a pretty nice netbook – for a reasonable price you get 1Gb RAM, 160Gb hard drive, 1024 x 600 screen and 5 1/2 hours of battery life. However it comes with Windows XP or Linpus, which is a customized Linux distribution from Acer. Neither of these options appealed to me.…
Part Design Tools and Workflow
about 16 years ago - 1 comment
After spending quite some time trying different pieces of software I have come up with a collection and a workflow that I think will fit my needs. I wanted to be able to accurately design parts in 3D, see how the parts will fit together to make sure they are right, and produce traditional engineering…
Low Cost and Free CAD Programs
about 16 years ago - Comments Off on Low Cost and Free CAD Programs
I have stumbled across a large list of low cost and free CAD programs, mostly for Windows however. It seems there are many good choices in the list and I will try out a couple in the next day or two. Bookmark to: Hide Sites
Windows XP and Stepper Motors
about 16 years ago - 2 comments
My first test after assembling the board was to connect one motor to each axis in turn and test using Windows XP SP2 and Mach3. The test involved going to the motor tuning section and pressing the up and down arrows. On the X and Y axis it was clear that steps were being lost.…
Testing EMC2/LinuxCNC on Ubuntu 7.10 Gutsy
about 16 years ago - 1 comment
I just completed the first test of running EMC2/LinuxCNC on Ubuntu with the HobbyCNC board. I connected a motor to the X-axis and started EMC2 with the “Axis” interface. I then told it to execute the default G-code file it loads with. Lo and behold the motor started spinning! I then moved the motor to…
Comments are closed.
about 16 years ago
Excellent tutorial, made my life very simple.
BTW You can use [gksudo emc] as an icon command to prompt for a password, avoids using the cmd line.
about 16 years ago
Hi Andy,
Nowadays, I’m trying to compile and to run EMC2 in Debian Lenny (which has the same kernel with Ubuntu 7.10)
The segmentation fault problem of halcmd occurs for me too. I use the following to not run EMC2 as root:
chmod 4750 halcmd
chown root:my_user_group halcmd
Secondly, I don’t turn off “ACPI support” completely at the kernel compilation step. I only turn off “ACPI processor support”
Power management options (ACPI, APM) —> ACPI (Advanced Configuration and Power Interface) Support —> Processor —> disabled
So, the computer may power itself off.
about 16 years ago
Interesting – I’ll give the chmod/chown options a try and possibly update the instructions. I previously tried sudo for halcmd and emc, but it didn’t work.
about 16 years ago
After some testing, I see that chmod is not a solution. It’s only solve the halcmd problem, but EMC2 is not running correctly without sudo
about 16 years ago
sudo problem is solved for my Debian Lenny box. It’s related with udev and memlock size.
The instructions for Debian Lenny are on http://wiki.linuxcnc.org/cgi-bin/emcinfo.pl?Debian_Lenny_Compile_RTAI#OS_Configuration
about 16 years ago
ACEMI – I tried the chmod and chown on /usr/local/bin/halcmd. No luck. So then I tried changing the 40-permissions.rules file for udev. Still no luck. The hard memlock is already set to a high value in my steps.
about 16 years ago
ACEMI – problem solved. I was missing the “*” in the hard memlock line. Thanks to Jeff Epler for pointing this out.
about 16 years ago
Hi Andy,
Great job! Helped me get things compiled on the new Hardy stable 8.04 with only minor changes.
about 15 years ago
hi Andy,
Everything worked just right
…..
carlos@ubuntu:/usr/src$ sudo nano -w /boot/grub/menu.lst
carlos@ubuntu:/usr/src$ uname -a
until here:
Linux ubuntu 2.6.22-14-generic #1 SMP Tue Feb 12 07:42:25 UTC 2008 i686 GNU/Linux
carlos@ubuntu:/usr/src$ cd /home/carlos/Área\ de\ Trabalho/rtai-3.6-test1
carlos@ubuntu:~/Área de Trabalho/rtai-3.6-test1$ make menuconfig
make[1]: Entering directory `/home/carlos/Área de Trabalho/rtai-3.6-test1/base/config/kconfig’
make[1]: /home/carlos/Área: Ficheiro ou directoria inexistente
make[1]: *** No rule to make target `/home/carlos/Área’. Stop.
make[1]: Leaving directory `/home/carlos/Área de Trabalho/rtai-3.6-test1/base/config/kconfig’
make: *** [mconf] Error 2
Could you tell me where is the mistake.