Interesting Tech Projects
Cooke Triplet Lens System in Geomagic Design
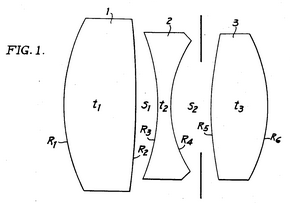
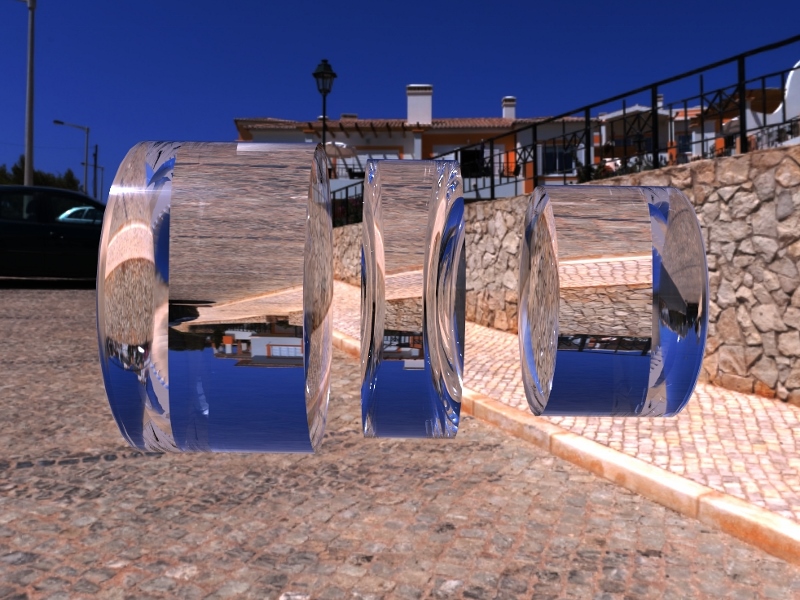
The Cooke Triplet is a system of three lenses designed in the 19th century to reduce distortion. In 1950 a specific triplet was invented and patented by Eastman Kodak (EF=100mm, f/1.9) and we will look at how to recreate it in Geomagic Design using scripting. We will create a script that can generate any type of thick lens, including how to solve the lensmaker’s equation. Hopefully the techniques demonstrated here will be useful to others solving and creating mathematical shapes in Geomagic Design.
Download, install and run WizoScript 1.70 or later. Start Geomagic Design. This script was tested with version 16.0.1.16490.
First we must enable a couple of useful libraries and make sure our script is using millimeters to match the values in the patent.
import sympy
from sympy import *
import math

Units.Current = UnitTypes.Millimeters
We are going to generate three lens parts and save them so we need to specify a location to save to. Change this to make your PC.
OutputFolder = "P:\\temp"
The patent completely describes the three lenses but we are going to make it a bit more interesting by calculating the radius of the back of the lens from the focal length. To do that we need to use the lensmaker’s equation.
In the formula the radius of the back of the lens is R2. This appears in two locations in the formula. We could rearrange it to give us R2 = … but that is a bit tedious. Instead we can leave WizoScript to worry about it instead. Here is how we enter the equation into the script using ‘rb’ to represent the radius of the back of the lens.
# calculates the back radius of a lens based on the other parameters
# uses the lensmaker's equation
def GetBackRadius(FrontRadius, Thickness, RefractiveIndex, FocalLength):
  rb = Symbol('rb')
  Equation = Eq((RefractiveIndex-1)*((1/FrontRadius)-(1/rb)+(((RefractiveIndex-1)*Thickness)/(RefractiveIndex*FrontRadius*rb))),(1/FocalLength))
  # we don't bother rearranging the equation, instead we let the sympy module do that for us
  BackRadius = solve(Equation)[0]
  return BackRadius
WizoScript rearranges the equation and calculates the value we need using the single line:
BackRadius = solve(Equation)[0]
The equation is placed into a function called ‘GetBackRadius’ which calculates the value when given a set of parameters, such as the thickness of the lens, refractive index of the material, etc. We can call the function repeatedly for different parameters.
Now we need to start creating a part for a single lens. First we tell Geomagic Design to create a part. We are going to do that in a new function.
# creates a part representing a lens based on a set of parameters
def GenerateLens(Name, Folder, FrontRadius, Thickness, RefractiveIndex, FocalLength, Diameter):
  # get missing parameter
  BackRadius = GetBackRadius(FrontRadius, Thickness, RefractiveIndex, FocalLength)

  # check diameter is small enough
  if Diameter > abs(FrontRadius):
    print "%s diameter is larger than the front radius %f" % (Name, FrontRadius)
    return
  if Diameter > abs(BackRadius):
    print "%s diameter is larger than the back radius %f" % (Name, BackRadius)
    return

  # create new part
  Lens = Part(Name)
The general approach we will take is to draw a 2D profile of half of the lens on the XY plane and then create a revolve boss around the X axis. The X axis is the optical axis (i.e. the center of rotation for the lens).
  # start creating the 2d sketch representing the shape of the lens
  Profile = Lens.AddSketch("Profile", Lens.GetPlane("XY-Plane"))

  LensRadius = Diameter / 2.0
First we will draw the front of the lens. There are three possibilities, the front is flat (infinite radius), bulging out aka convex (positive radius) or indented aka concave (negative radius). We treat each case individually. Simple trigonometry is used to calculate the end points of the front. Note that infinity is represented in the script by ‘oo’.
  # draw shape of the front of the lens, it can be flat, convex or concave
  if FrontRadius == oo:
    FEndX = 0
    Profile.AddLine(0, 0, FEndX, LensRadius, False)
  elif FrontRadius > 0:
    Angle = asin(LensRadius / FrontRadius)
    FEndX = FrontRadius - (cos(Angle) * FrontRadius)
    Profile.AddArcCenterStartEnd(FrontRadius, 0, FEndX, LensRadius, 0, 0, False)
  else:
    FrontRadius = -FrontRadius
    Angle = asin(LensRadius / FrontRadius)
    FEndX = (cos(Angle) * FrontRadius) - FrontRadius
    Profile.AddArcCenterStartEnd(-FrontRadius, 0, 0, 0, FEndX, LensRadius, False)
The back of the lens is treated in the same way except the sign of the radius is reversed. This means that a convex shape is a negative radius and a concave shape is a positive radius.
  # draw shape of the back of the lens, it can be flat, convex or concave
  if BackRadius == oo:
    BEndX = Thickness
    Profile.AddLine(Thickness, 0, BEndX, LensRadius, False)
  elif BackRadius < 0:
    BackRadius = -BackRadius
    Angle = asin(LensRadius / BackRadius)
    BEndX = (cos(Angle) * BackRadius) - BackRadius + Thickness
    Profile.AddArcCenterStartEnd(Thickness - BackRadius, 0, Thickness, 0, BEndX, LensRadius, False)
  else:
    Angle = asin(LensRadius / BackRadius)
    BEndX = -(cos(Angle) * BackRadius) + BackRadius + Thickness
    Profile.AddArcCenterStartEnd(Thickness + BackRadius, 0, BEndX, LensRadius, Thickness, 0, False)
Before we can add the revolve boss we must make sure the sketch is closed by drawing the line for the outside of the lens and the line along the optical axis
  # check diameter of lens again
  if FEndX > BEndX:
    print "%s diameter is too large" % Name
    return

  # if this is not a "thin" lens then draw top of profile
  if FEndX != BEndX:
    Profile.AddLine(FEndX, LensRadius, BEndX, LensRadius, False)

  # draw line of profile along x axis (optical axis)
  Profile.AddLine(0, 0, Thickness, 0, False)
Now for the revolve boss.
  # create lens by revolving sketch around x axis
  Lens.AddRevolveBoss("Lens", Profile, Lens.GetAxis("X-Axis"), 360.0)
Creating two reference planes for the front and back of the lens will help with aligning them to create the triplet. Finally we save and close the part.
  # add reference planes to aid in aligning this lens with others
  Lens.AddPlane("Front", Lens.GetPlane("YZ-Plane"), 0);
  Lens.AddPlane("Back", Lens.GetPlane("YZ-Plane"), Thickness);

  # save and close
  Lens.Save(Folder)
  Lens.Close()
The last step is to generate the three lenses needed for the triplet using the values from the patent along with the focal length.
# lens 1
GenerateLens("Lens1", OutputFolder, 62.63, 25.56, 1.745, 73.2, 40.0)
# lens 2
GenerateLens("Lens2", OutputFolder, -66.47, 4.51, 1.647, -37.74, 36.0)
# lens 3
GenerateLens("Lens3", OutputFolder, 119.5, 19.92, 1.697, 54.88, 30.0)
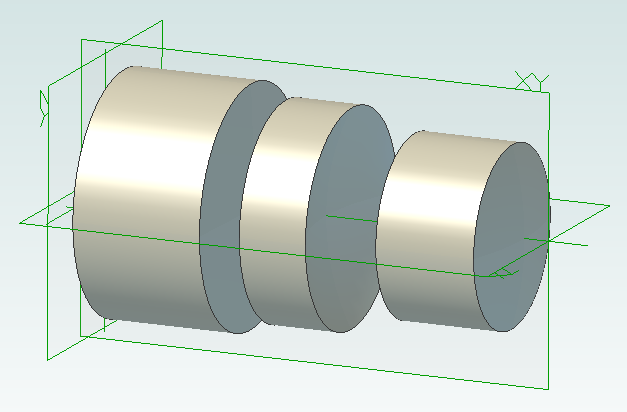
The complete script can be obtained from the script library. Running it will generate three part files, one for each lens.
Create a new assembly and add the three lenses in the order lens1, lens2 and lens3. Align the X axis of all three lenses. Align the front plane of lens2 7.89mm from the back plane of lens1. Align the front plane of lens3 14.14mm from the back plane of lens2.

| Print article | This entry was posted by Andy on July 3, 2014 at 1:01 pm, and is filed under Computer Aided Design, Software Engineering. Follow any responses to this post through RSS 2.0. Both comments and pings are currently closed. |
Comments are closed.


